
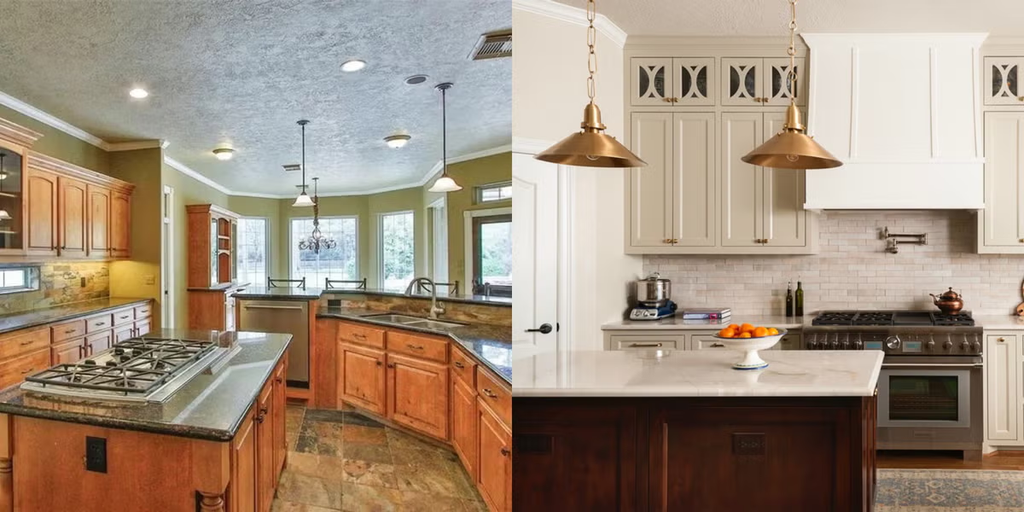
The Problem
A kitchen renovation rarely fails because of one bad decision; it fails because dozens of small choices pile up without a clear plan. Cabinet finishes, hardware, lighting, and layout all interact in ways that are easy to underestimate until the work is already underway. Many homeowners start with a general idea of what they want, then discover mid-project that their choices clash or that the timeline has stretched far beyond what they expected. The result is often a kitchen that looks fine in photographs but feels disjointed in daily use, from mismatched tones to storage that never quite functions the way it was supposed to.
Cost overruns compound the frustration. Contractors frequently note that clients change their minds on finishes after seeing samples installed rather than in a showroom, which triggers reorders and delays. Stain colors in particular cause hesitation because they look different under kitchen lighting than they did on a paint chip or online image. This pattern shows up across renovation projects regardless of budget size, from modest updates to larger remodels. Without a structured way to compare options early, families end up making rushed choices under pressure, which rarely produces a result they are happy with a year later.
The Approach
A more reliable method starts with narrowing the field before any physical samples arrive. Homeowners who spend time comparing kitchen cabinet stain colors against their existing floors, countertops, and wall colors tend to avoid the last-minute swaps that derail budgets and schedules. This early research phase does not need to be exhaustive, but it should include real photos of finished kitchens under different lighting conditions, since stain tones shift noticeably between morning light and evening light. Setting this groundwork before ordering materials gives the rest of the project a stable foundation to build from.
Once a shortlist of finishes exists, the next step is testing them against actual samples of hardware and countertop material rather than relying on memory or a swatch book. Small physical samples, held up in the space where the cabinets will actually sit, reveal undertones that don’t show up in a store display. It also helps to walk through the kitchen at different times of day before finalizing anything, since natural light changes how warm or cool a stain appears. This process takes a little longer than picking the first option that looks appealing, but it prevents the common mistake of committing to a finish that only works in one specific lighting condition.
What to Look For
When evaluating finish options, durability matters as much as appearance. A stain that scratches easily or shows water spots will age poorly in a kitchen that sees daily use, regardless of how attractive it looked on the first day. Homeowners should ask contractors about the type of sealant used over the stain, since this affects both longevity and how the finish reacts to steam, grease, and cleaning products. Even a well-chosen color loses its appeal quickly if the finish beneath it fails within the first two years. Matching the sheen level to the rest of the kitchen’s hardware and fixtures also prevents a disjointed look that becomes obvious once the room is fully assembled.
Comfort and daily wellbeing deserve consideration too, since the kitchen is often the busiest room in a house and poor ventilation or clutter can add stress to everyday routines. Organizations such as the CDC health and wellness resources publish guidance on maintaining healthy indoor air quality and reducing household stressors, which is worth reviewing when planning ventilation, lighting, and storage during a renovation. Paying attention to how a space affects mood and stress levels, not just how it photographs, tends to produce a kitchen that holds up better over years of actual use. A finish or layout that looks striking but makes the room harder to clean or navigate rarely earns its keep once the initial excitement fades.
